Compositing Images to Increase Depth of Field in Macrophotography
Anyone who has attempted macrophotography knows that there are numerous obstacles to creating sharply focused images of minuscule subjects. Even if you have all the equipment necessary, a vibration free work area, and an interesting specimen, there will be optical difficulties conspiring against you. When working at high magnifications, depth of field is severely limited. When doing normal, scenic photography this can be compensated for by decreasing the lens aperture size, thus increasing the depth of field (see Aperture and Depth of Field). When doing macrophotography though, light is diffracted around the aperture blades when they are stopped down too far, causing the image to loose sharpness. Most macro lenses appear to be sharpest when stopped down no farther than 2 stops from wide open. If you have patience and a sedentary subject, you can use Photoshop to composite multiple images with shallow depth of field into one sharp image with much greater depth of field. Below is a tutorial on how to manually composite a stack of images using Photoshop. New stacking software on the market will allow you to do this compositing automatically. These softwares make it much easier to combine large numbers of images into one image with extended depth of field. I've had great results with Helicon Focus Pro. Another stacking software is CombineZP, and a tutorial on how to use this software can be found at WonderfulPhotos.com.
Set up for Macrophotography
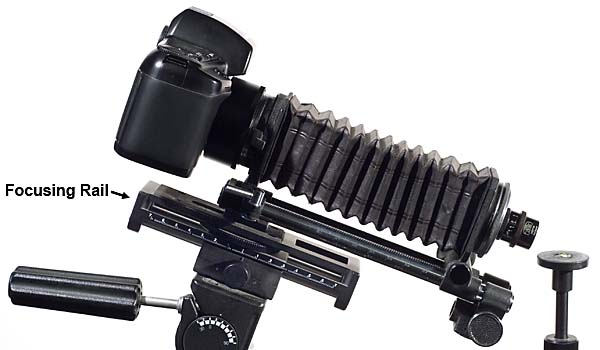
This is a standard setup I use for doing macrophotography. The camera, bellows, macro lens unit is mounted on a focusing rail, which in turn is mounted to a tipod head. When photographing a flat object, the depth of field of the lens (stopped down no more than 2 stops from wide open) may be sufficient.
Just make sure the camera back and the subject plane are parallel to each other. When photographing a rounded object (e.g. Broad-nosed Weevil) or an object from an oblique angle (below) this depth of field will seldom be sufficient.
If you have the funds available, Cognisys Inc. makes a motorized microprocessor controlled device called the Stack Shot which automates the macro imaging process.
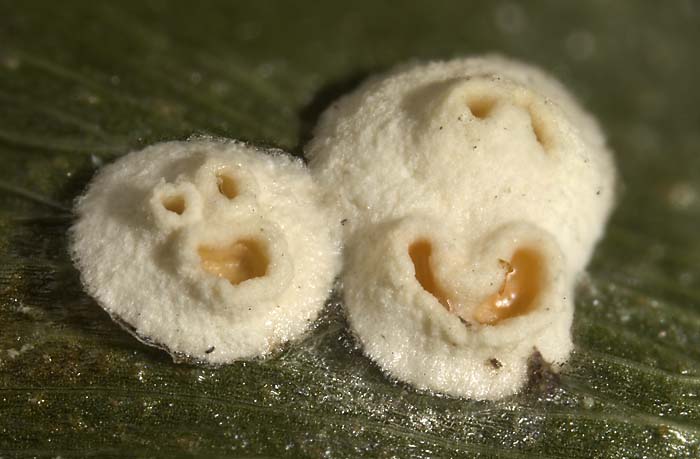
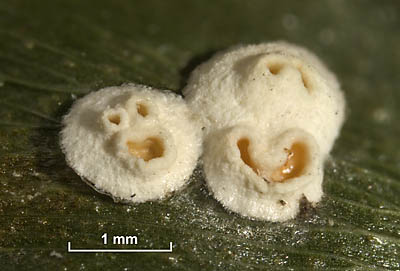 This image of a tiny, smiling fungus is a composite created from 5 images made with a similar set up as above. The fungus was photographed at an oblique angle. To obtain maximum sharpness the lens was stopped down 2 stops from wide open. At this setting though, the depth of field was very shallow and insufficient for viewing the entire specimen.
The individual images comprising the composite can be seen in this animation (Quick Time is needed to view the animation). Each image was taken at the same magnification (bellows extension), lighting, and exposure. The only change was to move the focusing rail slightly between each exposure.
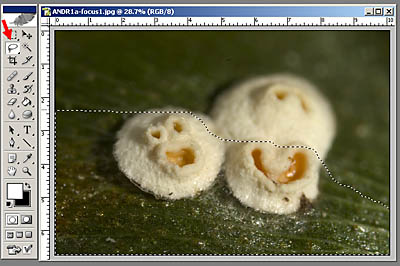
Download the images to your computer. I generally make no exposure adjustments at this point, but if you do, make sure to make the same adjustment to each image (see Using Photoshop Actions). Determine which area of the first image is in good focus and select it using the lasso tool (red arrow). Include some of the area that goes out of focus for it's nice to have plenty of overlap with the next image.
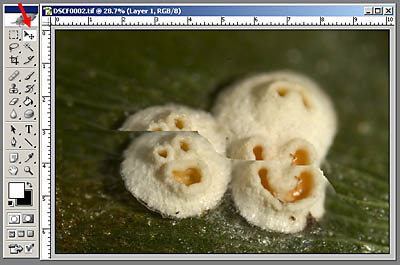
Using the move tool (red arrow) move this selection onto the next image in the set and place it roughly in the correct position.
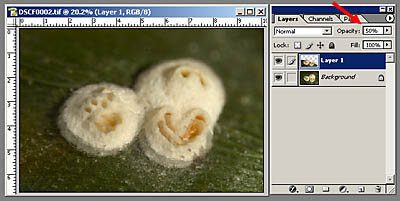 In the Layers palette you will see the two layers. Make sure Layer 1 is highlighted and change the Opacity to 50% (red arrow). You can now critically align the two images using the move tool and directional arrows on keyboard.
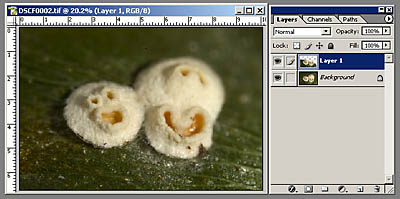 When aligned, change the Opacity back to 100%. From a distance the two images should blend together but when you enlarge the image you will most likely see an edge where they meet.
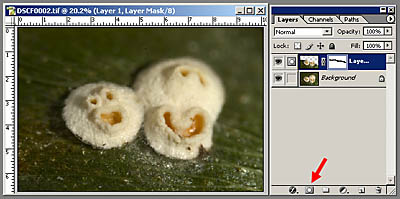 To eliminate this edge, create a Layer Mask (red arrow). For information on Layer Masks see Using Layer Masks. Use a large, soft brush and the paint tool to paint on the mask and blend the two images. It's helpful at this point to click the Eye icon next to Layer 1 in the Layers palette on and off to see where the sharp parts of the two images are. If you paint too much and expose out of focus areas on the Background image, just switch the foreground color to white and paint it back in.
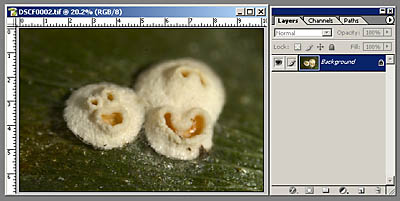 When the two images blend together well, flatten the image (Layer/Flatten Image) and save. Repeat this process, adding the sharp parts of each image together until all the images are merged.