Creating the Fungi of China Exhibit
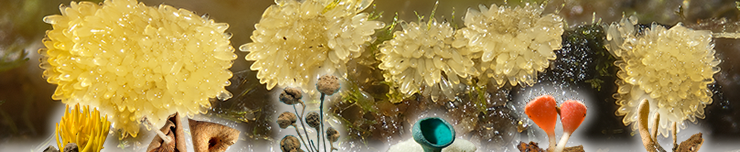
Creating the images for the Fungi of China exhibit was a lot of fun and quite a challenge. It's not often that I'm asked to create beautiful and interesting images ("artsy" as it were) of 80 year old, tiny, dried up, mostly brown specimens. In the studio I was able to get out and play with all my "toys". Bellows, numerous macro lenses, melted acetate sheets, and a variety of lights and lighting techniques were used in the intitial photography. The digital files were then manipulated in Photoshop to create the final images for the exhibit.
Step 1 - The Specimens
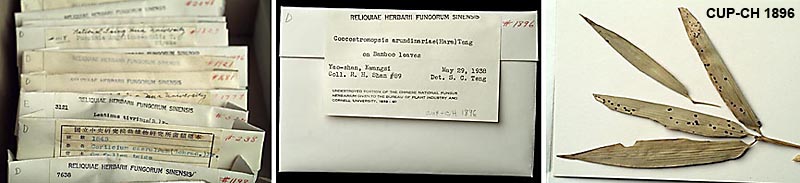
The specimens have been stored for the past 70-80 years in these Herbarium envelopes. The envelopes themselves seemed quite exotic with Chinese, English, and Latin writing. Upon opening and viewing the specimens I was somewhat disappointed by their plainness. On closer inspection though, I realized that the surface topography and shapes of the fungi were quite interesting. At this point it became apparent that lighting each specimen to enhance these surface features would be very important.
Most of the specimens had little inherent color. They were dried out and mostly tan and brown. To spice them up for the exhibition images, color would have to be introduced into the backgrounds.
Step 2 - In the Studio
When thinking about how to create colorful backgrounds for the fungal specimens I serendipitously came across a box containing dozens of brightly colored sheets of acetate. After some experimentation I found that they could be heated up using the studio tungsten lamps and then twisted and contorted while hot. When cool, the sheets held their shape and could be stacked to create interesting color combinations.
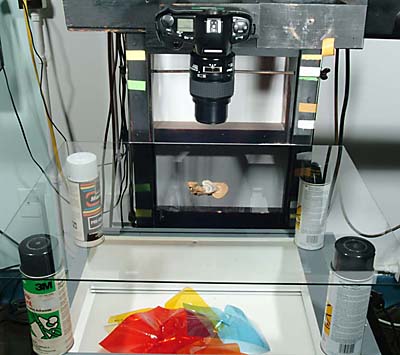
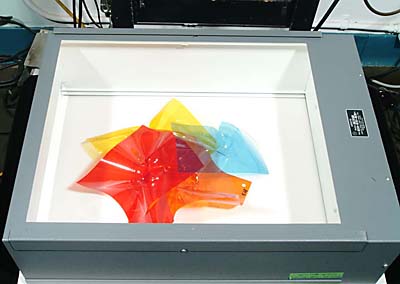
The piles of colored acetate were placed in the bottom of a light box on a sheet of white foamcore. When illuminated with the light box lights or external studio lights the overlapping sheets produced brilliant colors and the specular highlights from the twisted surfaces created interesting graphic accents. Finally, the specimen was placed on a piece of clear glass mounted a foot or more above the acetates (seeIt was importatant to separate the specimen from the background by a substantial amount in order to throw the background completely out of focus while maintaining sharp focus on the subject (see Floating Backgrounds). Aperture and Depth of Field). To achieve this end a rather large aperture (usually f/8 or f/5.6) was used for the exposure. Due to the shallow depth of field at these apertures, often several pictures were taken of each specimen, focusing on different areas of the subject. The sharp areas of each picture were combined later using Photoshop (see Compositing Images to Increase Depth of Field).
Each specimen was then lit with either tungsten or flash illumination to enhance it's surface texture and shape. All the specimens were photographed with a Fuji S2 6Mp camera. The exposures were made in Raw format and converted to 16 bit files for editing in Photoshop.
Step 3 - Post Production
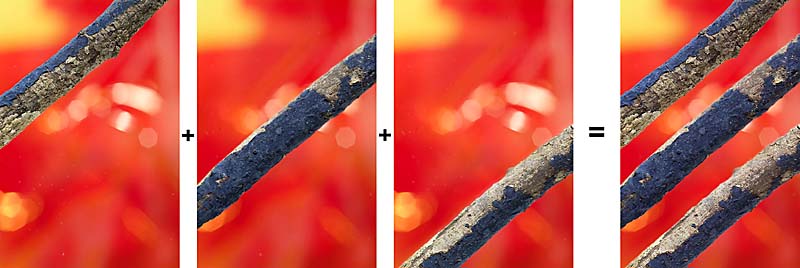
After each specimen was photographed it was edited in Photoshop. All the basic Photoshop tools were used as well as some advanced techniques such as the use of Layer Masks. In the example below, there was only one twig in the specimen envelope. I decided to photograph the twig three times with the same background and exposure, rotating the twig to a new position for each photograph. The three images were composited into one using layer masks. Several of the images were created in this way.

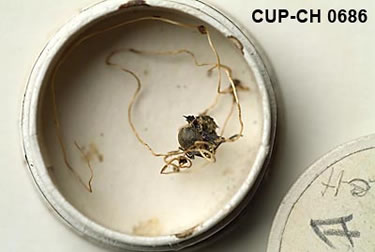
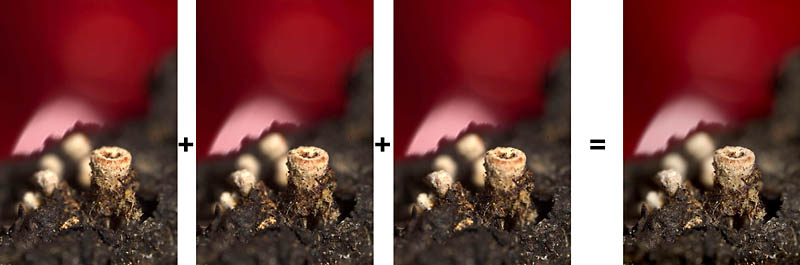
Several of the specimens, such as this one to the right, were minuscule. To create the final images for these small specimens, numerous exposures with slightly different focus points were composited into one using Photoshop(below). This technique can be used to increase depth of field in the final image. This technique is explained in the tutorial on Compositing Images to Increase Depth of Field in Macrophotography.
Step 4 - Final Sizing
When all the images were edited they were saved for archiving as 16bit TIFF files. For printing, the files were converted to 8bit files and upscaled to the final size (20x30" @ 300 ppi) using the Photoshop plug-in Genuine Fractals.
Back to Fungi of China Gallery